Picture Maker: the four-colour drawing program
Picture Maker by David Makin came out in December 1987 from John Penn Software, for five pounds. You draw on the graphics screen in four colours, with the arrow keys or a joystick. The full instructions are inside the program itself. Here are the essentials.
Starting
Type CLOADM and ENTER. The load is long, and at the end you get a demo picture, a tune and a menu:
| 1 | Start drawing |
|---|---|
| 2 | Print the instructions on a printer |
| 3 | Read the instructions on screen. Space turns the page |
The cursor
Move the cursor with the arrow keys. For a joystick, plug it into the right-hand socket and press J. K turns it off, and the keyboard always works. Holding SHIFT freezes the cursor, which helps when you want to move diagonally without drifting.
For the functions marked with a star (*), the current value appears on screen. Change it with the up and down arrows, and confirm with ENTER.
Colours
| 1–4 | Drawing colour |
|---|---|
| 5–8 | Background colour |
| @ | Switch between the two colour sets: green, yellow, blue and red, or buff, cyan, magenta and orange |
Drawing
The brush works for as long as you hold Space, or the joystick button, and move the cursor.
| B | Brush type *: pen, rubber, line, box, or a piece of the picture you stored |
|---|---|
| H / W | Brush height / width * |
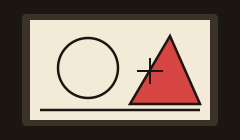
| C | Circle: the centre is at the cursor. Move, then ENTER |
| L | Line from the cursor. Move, then ENTER |
| SHIFT + L | Box |
| F | Fill an area up to a border in the background colour |
| SHIFT + F | Fill an area up to a border in the drawing colour |
| M | Magnify: see the area near the cursor, enlarged |
For every shape, ENTER keeps it and BREAK cancels. The author himself advised anyone who isn't a good artist to use the "line" brush: each press of Space draws a line from the last point.
Three screens
Besides the screen you see, there are two stored screens. One is yours (USER), and the program uses the other before some functions (AUTO). That lets you go back to an earlier version.
| SHIFT + K | Store the picture in the USER screen |
|---|---|
| CLEAR | Swap the picture with the USER screen |
| S | Swap the picture with the AUTO screen: a kind of undo |
| SHIFT + BREAK | Clear the picture |
| R / SHIFT + R | Mirror / upside down |
| , . < > | Move the whole picture up, down, left, right |
Pieces of the picture
G stores a piece of the picture: move a frame around it and press ENTER. You can store up to 8 pieces. P and the piece number bring it back, and you move it into place. There are more ways to lay a piece down: O, A, N, I, E and T, like the options of PUT in BASIC. V and Z double a piece in height or width. When you start, two pieces are already stored: letters, for writing on the picture.
Saving and leaving
| SHIFT + 9 | Save the picture to tape |
|---|---|
| SHIFT + 0 | Load a picture from tape |
| * | Save everything: both screens and the pieces |
| SHIFT + Q | Back to BASIC |
Before saving you can type a file name.
This guide is in our own words, for Dragon owners who have the original program. We do not host the program or its instructions. The keys come from the instructions inside the program, and we tried the main ones on an emulated machine with the same chips.
All guides · What Dragon Owners Were Reading · The history of the Dragon